16 Aug 2017
I’ve used git for version control for a good while now, but I’ve never really tried to understand the difference between merging and rebasing. I guess I’m a bit lazy that way, having a “If it works, it works” mentality. I’ve now spent some time figuring out the difference, and try making a short and understandable post about it.
The Difference
Both commands, git rebase and git merge, solves the same problem. Taking changes from one branch and integrating them into another. The difference happens in how changes are spliced together.
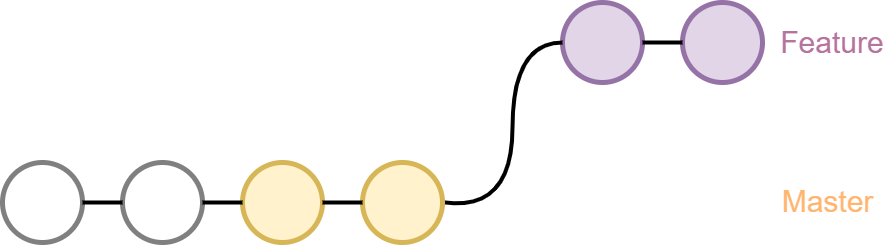
A typical use case is having a master and a feature branch. You want the changes from the master into the feature branch. Doing the git merge master command from the feature branch will create a new merge commit in your feature branch. A merge is basically a new commit, with two parents.
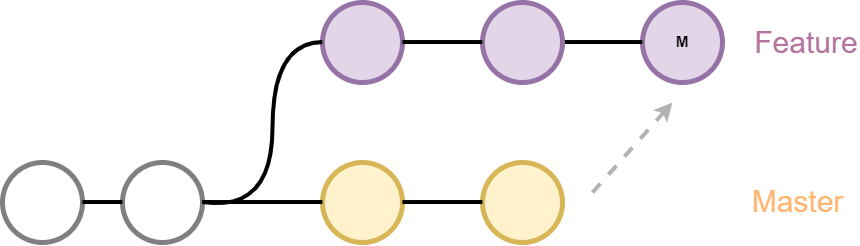
Whereas, rebasing will put the feature branches’ changes onto the master branch. The git rebase master will effectively move the commits to the tip of the master branch. Another way of looking at it is that you are relocating the place where you branched out from master to a more recent place in master’s history. In addition, a rebase will for every commit in feature create a new identical commit on top of master.
Advantages and Disadvantages of Rebasing
- Cleaner history that is easier to read.
- Slightly harder than merging.
- Rewrites the commit history. which might be problematic.
- You can’t see when changes from master were incorporated into feature.
- Gives you the ability to use interactive rebasing. You can remove intermediate backup commits and replace it with a single commit. You can also reword your commit messages.
- Maybe the best way to incorporate changes another developer made on master onto your feature branch.
Advantages and Disadvantages of Merging
- Merging is a non-destructive operation
- Each merge creates a commit, which might clutter the branches’ history.
- Traceability. You have a merge commit, which indicates that a convergence between two branches has taken place.
Finally, I would like to point out that the explanation above might be incorrect. It’s based on my current understanding of git. And I’m by no means a git wizard. Please read the references below to get a more thorough explanation.
Further Reading
Atlassian git tutorial
Stackoverflow answer
Blog post explaining the difference well
01 Jul 2017
Just learned how to do UV mapping in Blender, and thought I should write it down before I forget.
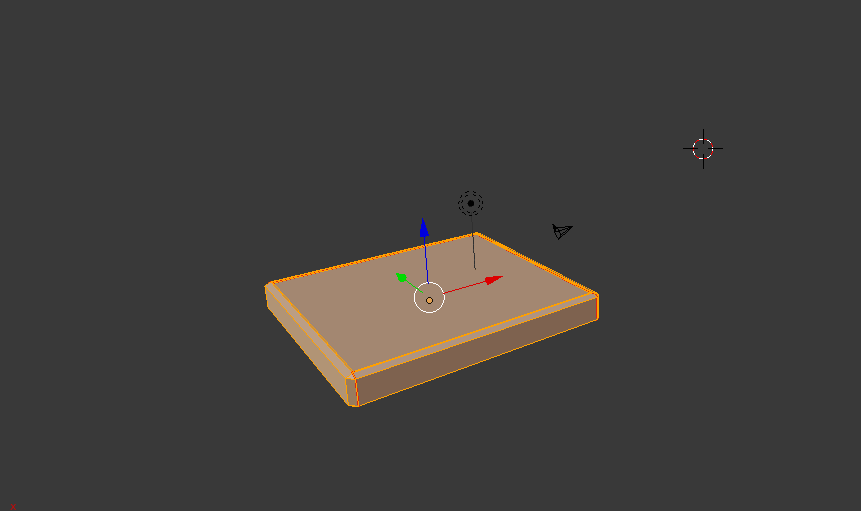
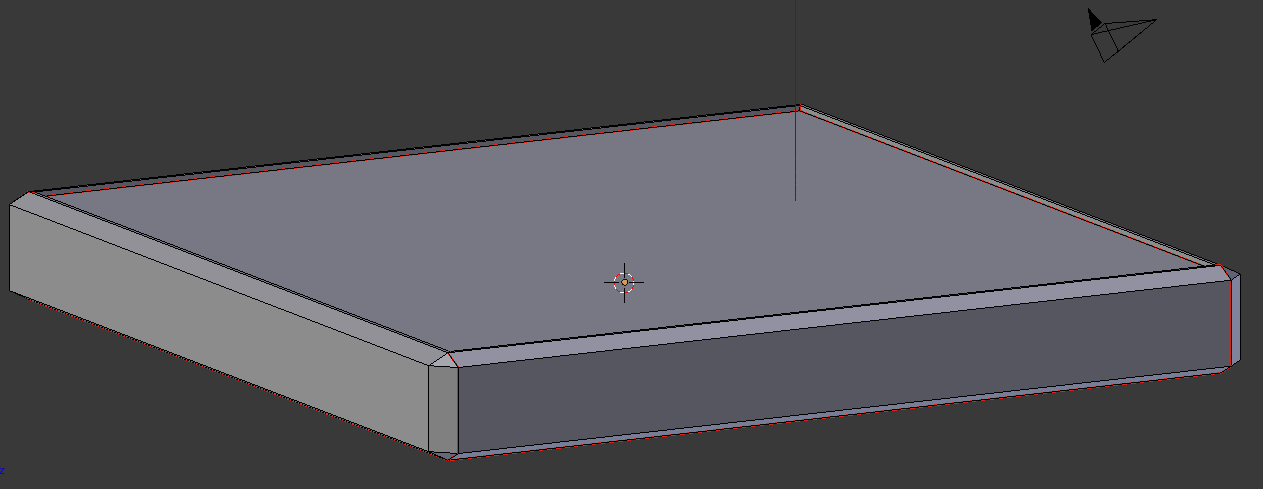
Currently, I’m doing the Learn 3D Modelling course at Udemy. I’m now past the basic modelling stuff, and wanted some practice. I decided to do a chessboard, and yup, you guessed it, not that challenging since it’s basically a square shape. It does not look anything like a chessboard, without the checker pattern.
So I decided to try out UV map painting, to see if I could turn this nondescriptive shape into a bona fide chessboard.
UV Mapping in Blender Recipe
1. Adding Seams
- The 3D model is complete and texturing is the next step. Your first step is to create seams to help Blender unwrap your model’s surface onto a flat plane. The plane area is where you’ll do the painting later on.
- Enter edit mode
<TAB>
- Open the tools section in the left sidebar
<T> of the 3D View
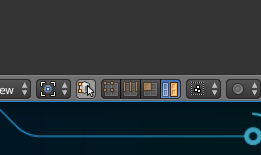
- Pick edge select mode to select seams on your model.
- Select edges that you want to convert to a seam. A loop selection of edges will create a disconnected island, which is good, when organizing the UV map later on. Create several of these. For instance, the chessboard was split by 4 seams. Top, bottom and two of the sides.
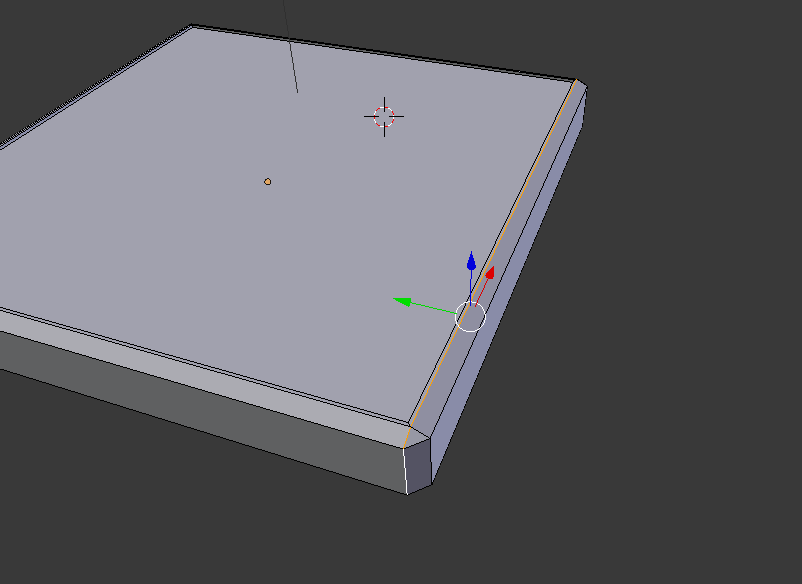
- To create the seam, scroll down in the
Shading/UVs section of the tools side panel, and make a seam when you are satisfied with an edge selection. You will find a button called Mark Seam.
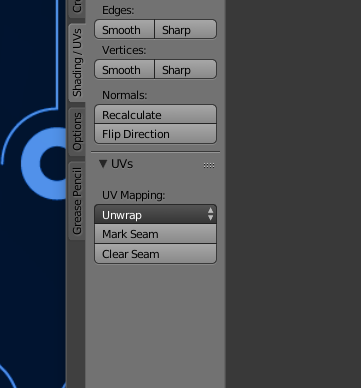
- After you’ve created some seams, select the entire model in edit mode by pressing
<A>. Then, click Unwrap.Again, click Unwrap in the drop down which will appear immediately after.
2. Clean the UV Map
- Open a
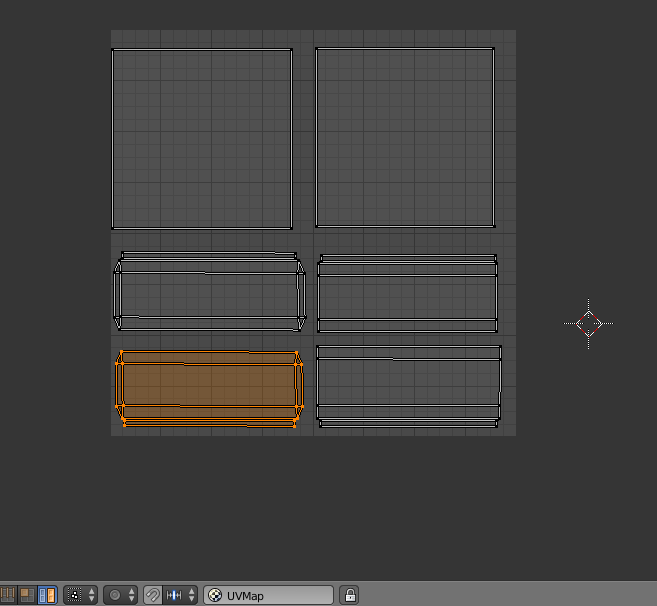
UV/Image Editor View. You will probably see something similar to this:
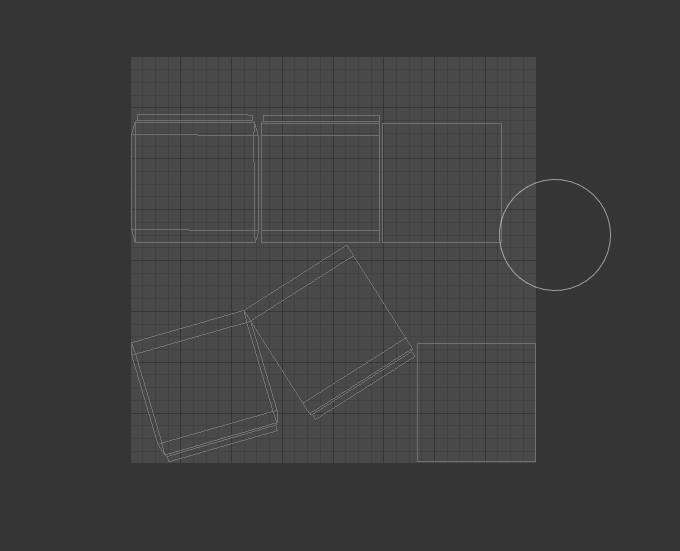
- To see if all the face sections are disconnected, use the
island UV selection tool. Right click on each face and see if only that face section is highlighted.
-
As you can see, two of the faces are still connected. To separate them select all the polygons of one section using the UV face selection tool and press the <Y> key. Use the grab tool <G> to see if the area is separated. More details here.
-
Then, reorganize the UV map by rotating, scaling and moving UV islands. The shortcuts are <R>, <S>, and <G> key, respectably.
3. Create the Texture and UV Layout Image
- Go to the
Texture tab. Create a new texture.
- Change
Type from none to Image or Video
- In the
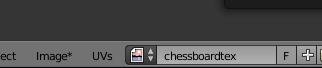
Image section, click new. Create a new image with width and height of 2048 and select a white color. Give it a sensible name. For instance, chessboardtex.
- Then, in the
Mapping section, change Coordinat to UV , and find the UV map in the Map drop down.
- Go to the
UV/Image Editor, select chessboardtex in the menu that appears after clicking the image icon in the toolbar. The white texture image will appear in the background of the UV map.
- The
Image menu item now has an asterisk. This is because you have not saved the image yet. Use the Save As Image option.
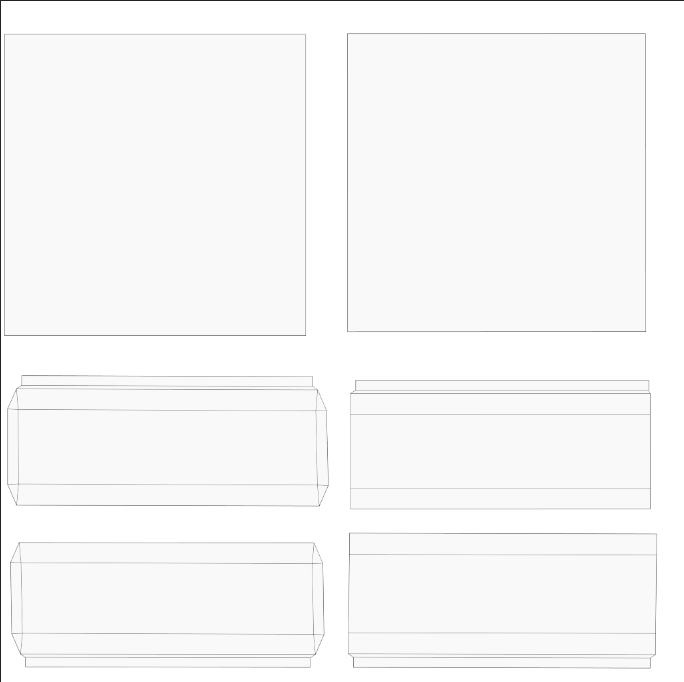
- If you want to do the UV paining in an external program, such as Photoshop or Gimp, you’ll probably want the UV layout as a reference when painting. Press
UVs and in the menu, select Export UV layout.
4. UV Paining
- Open an image editor (Photshop, Gimp or similar). Add the saved texture image and the UV layout image on top, in a new layer.
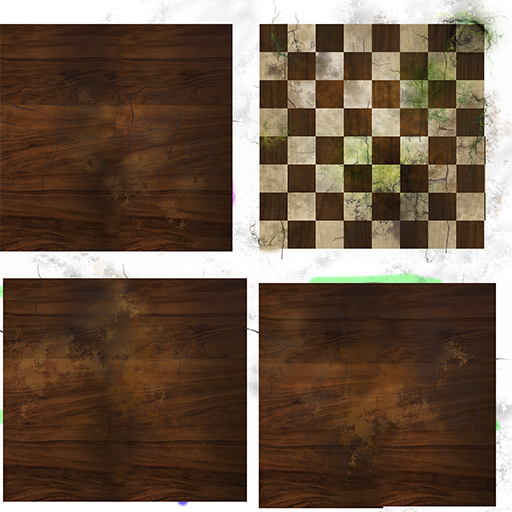
- Go wild painting. Below is my finished chessboard texture.
- In Blender’s
UV/Image Editor, go Image and press Reload image, to see the updated texture on your 3D model.
5. Add Model to Unity
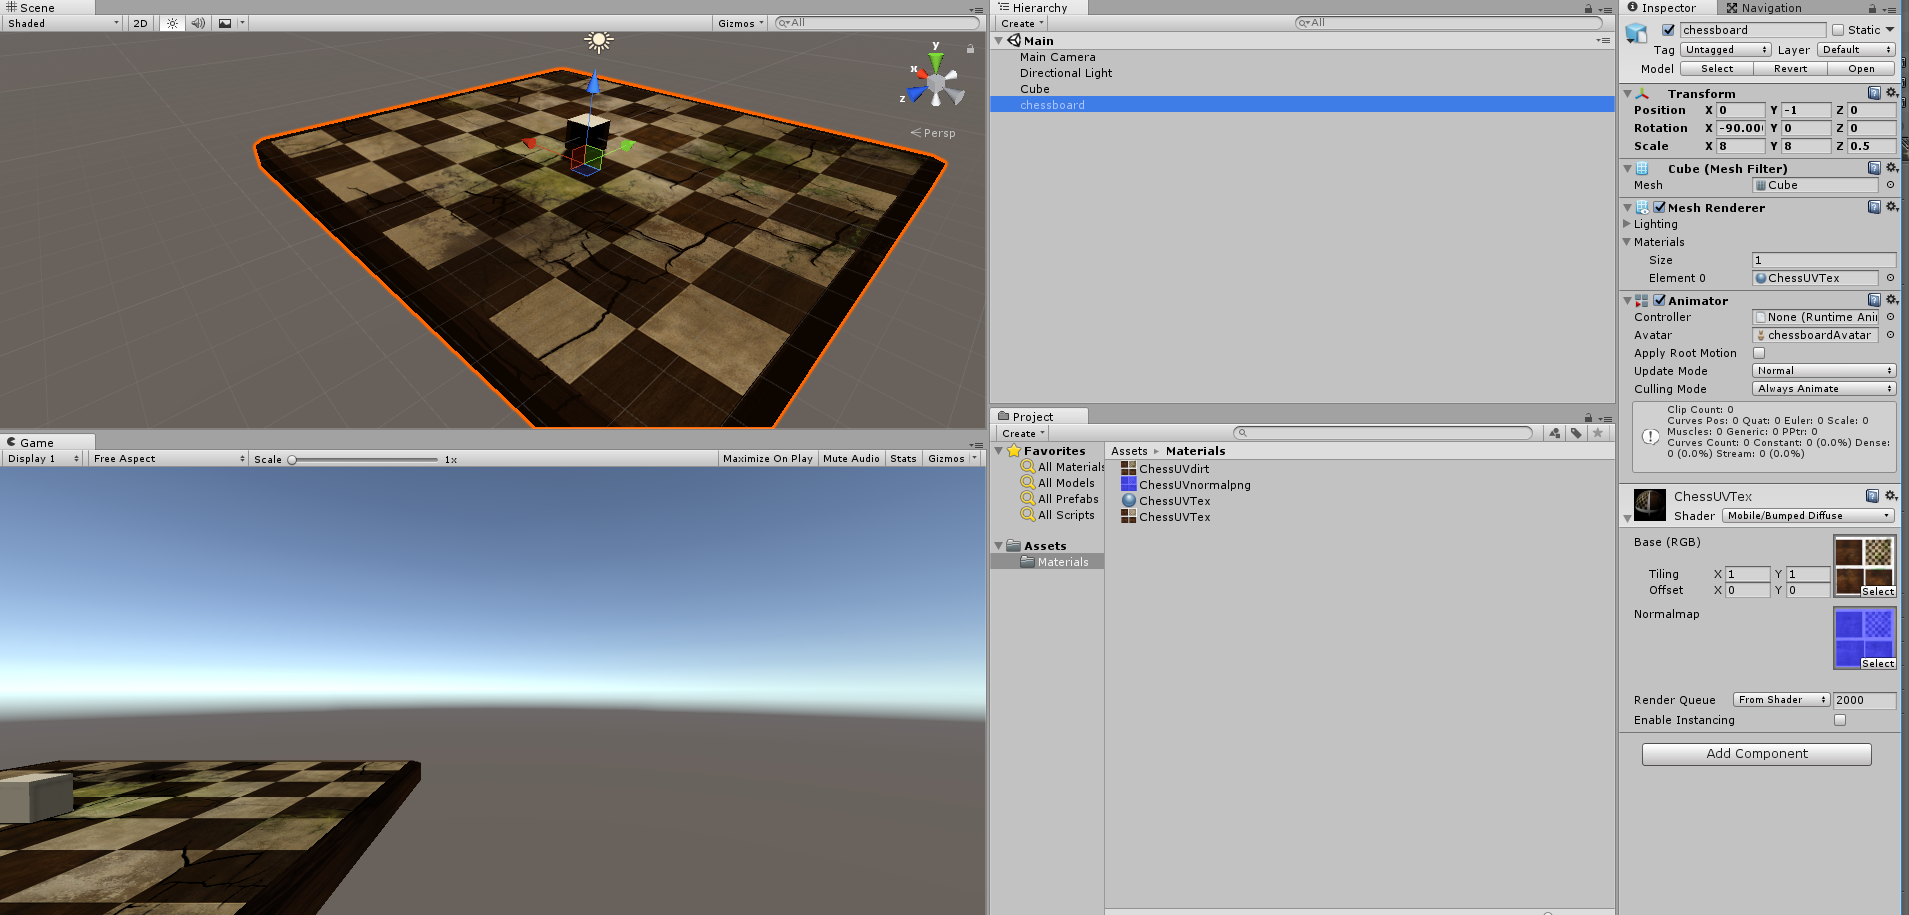
You now have a textured model in Unity.
Further Reading
Separate vertices
Exporting & Editing UV Maps
26 Jun 2017
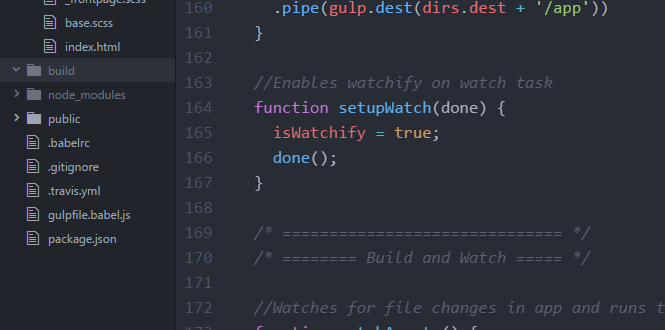
If you’re on Windows computer and using Atom, you might have encountered this error in your terminal, when running gulp watch:
Error: EPERM: operation not permitted, unlink 'C:\user\equalpasta\somepath\project\build'
A Google search reveals that variations of this error are a common problem.
Why does this happen? How to fix it? One reason can be the Atom editor. Turns out having the build folder expanded in Atom can cause this. It seems like Atom locks the folder if expanded in the project view, when running gulp watch.
Minimize the build folder in Atom, and re-run ‘gulp watch’.
This solved the issue for me.
24 Jun 2017
Since the previous post I’ve looked more into Gulp. I started migrating the tool website from the Express/React setup to use the static-react-starter project starter. The transition has worked fine so far, but I’ve realized some issues with the starter project.
- Gulp watch is slow to rebuild when the number of JavaScript files and dependencies increase.
- The resulting build structure is messy and results in urls that are long. Ideally I want a short path following the domain name.
- Each page is relatively large in file size, since the JavaScript files are not uglified.
The build time quickly became annoying. To fix this, I tried replacing gulp.watch with watchify for the JS files. Watchify helps incrementally rebuilding your bundles while developing, and works together with browserify. This really helped speed up the script rebundling time. Before it could take anywhere from 5-10 seconds from saving a file to the update appeared in the browser. After the switch, it takes less than a second. However, the initial build time only improved marginally, if at all. After adding uglify to the script task, the initial build time was around 14 seconds.
Creating an External Vendor Bundle
What solved this problem for me, was creating a vendor script bundle in addition to each subpage’s app script bundle. This can be done by taking Browserify’s external and require options in use. The result was that each app script bundle would only take around 1 second to build, whereas the vendor script bundle takes around 5 seconds to build. Much faster!
Why you Should do This
- You seldom update the dependencies of a project. Watching dependencies and building them more than once are unnecessary.
- In my case, each subpage utilizes mostly the same dependencies. Having a common bundle for vendor scripts might reduce load time because of caching.
- Improves the development workflow. Changes are propagated faster from the editor to your browser.
- With
gulp.parallel the app subpage script bundling task and the vendor bundle task are conducted in parallel.
Vendor Bundle with Gulp Recipe
Import Project Dependencies
Start by loading the dependencies into your Gulp file:
...
import packageJson from './package.json';

const dependencies = Object.keys(packageJson.dependencies || {});
...
The dependencies variable will contain a list of your project dependencies that you’ve added through npm install <dep> --save.
Modify your Script Bundler Gulp Task
You will need to tell Browserify about external requires. When Browserify encounters a require (or import) marked as external it will ignore it when building a bundle. Basically, it will trust you to add these dependencies through another script tag somewhere in your HTML.
...

let b = browserify(opts);
b.external(dependencies);
b.transform(babelify);

...
Create a Vendor Bundling Gulp Task
After modifying the app bundling task to ignore the dependencies, you’ll need to create a vendor script file.
Create a new Gulp task:
export function vendorScripts() {
  return browserify()
  .require(dependencies)
  .bundle()
  .on('error', (err) => console.log(err))
  .pipe(source('vendor.js'))
  .pipe(buffer())
  .pipe(uglify({compress: {unused: false}}))
  .pipe(gulp.dest(dirs.dest + '/app'))
}
You will also have to include this new task in your build task:
...

const build = gulp.series(clean, gulp.parallel(styles, vendorScripts, scripts, images, sounds, views))
export { build }

...
Add new Script Tag
Somewhere in your HTML, above where the app bundle script is, include the vendor bundle script. For instance:
...

<script src="/app/vendor.js"></script>
<script src="/app/tool1/entry.bundle.js"></script>

...
If you go to Chrome’s Network tab in the inspect window, you can see both vendor.js and entry.bundle.js will be requested on page load.
To see the entire Gulp file, go here.